I’m here to show you how to create a ring.
What Are Stones?
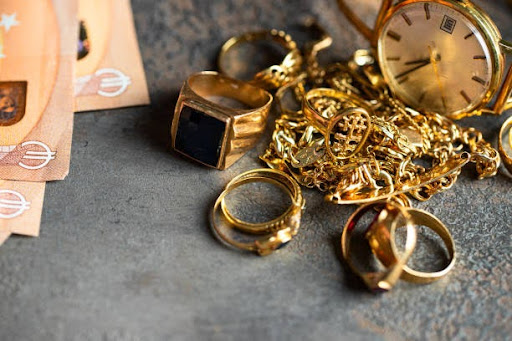
Stones are small, hard objects that are found in the ground. They can be smooth or rough, and are often used in jewelry and other decorative items.
There are many different types of stones, including diamonds, emeralds, rubies, and sapphires. Each type of stone has its own unique properties and characteristics. Stones can be cut and polished to create a variety of shapes and sizes, and they can also be left in their natural state.
When choosing stones for a ring, it is important to consider the type of metal that the ring will be made from. Some stones, such as diamonds, are best set in gold or platinum. Other stones, such as emeralds, rubies, and sapphires, can be set in a variety of metals, including silver and brass.
The size of the stone is also an important consideration when creating a ring. The stone should be proportional to the size of the finger it will be worn on. A small stone may look lost on a large finger, while a large stone may overwhelm a smaller finger.
The color of the stone is another important factor to consider when choosing stones for a ring. Some people prefer colorful stones, while others prefer more subtle colors. There are no right or wrong answers when it comes to choosing the color of the stones for a ring; it is simply a matter of personal preference. Alternatively, if you do not want to do all these, you can buy engagement rings online and avoid all the hassle.
Stone Setting: Prong, Bezel and Channel
There are many different ways to set a stone in jewelry, and each has its own advantages and disadvantages. The three most common settings are prong, bezel, and channel.
Prong setting is the most popular type of setting for diamond engagement rings. It allows the maximum amount of light to enter the stone, making it appear larger and more brilliant. However, prongs can catch on clothing or hair and may need to be replaced if they become damaged.
Bezel setting encircles the stone with a thin metal band. This type of setting is very secure and protects the stone from damage. However, it can make the stone appear smaller than it actually is.
Channel setting holds the stones in place with channels of metal on either side. This type of setting is also very secure and protects the stones from damage. Channel settings are often used for wedding bands because they allow the stones to sit flush with the band so that there are no sharp edges. You can order mothers ring with three stones online to celebrate each child’s birthstone, combining the security of a channel setting with the sentimental value of personalized gemstones, making it a perfect piece for everyday wear and special occasions alike.
Stone Setting Technique: Flush, Semi-Flush and Notch
There are three main types of stone setting techniques: flush, semi-flush, and notch.
Flush stone setting is the most basic type of setting, where the stone is set flush with the surface of the metal. This type of setting is often used for small stones or when there is not a lot of space to work with.
Semi-flush stone setting is similar to flush setting, but the stone is set slightly above the surface of the metal. This allows for a bit more light to enter the stone, making it sparkle more. Semi-flush setting is often used for larger stones.
Notch stone setting is when a small notch is cut into the metal to allow the stone to be set into it. This type of setting can be used for any size stone, but is often used for larger stones. Notch setting can also be used to create a more unique look.
Types of Metal
There are many different types of metals that can be used to create a ring. Some of the most popular metals include gold, silver, platinum, and titanium. Each metal has its own unique properties that make it ideal for certain types of rings.
Gold is a classic choice for rings, as it is durable and has a warm color that complements most skin tones. Silver is also a popular choice for rings, as it is more affordable than gold and has a bright white color. Platinum is the most expensive metal used for rings, but it is also the strongest and most scratch-resistant. Titanium is an increasingly popular choice for rings due to its strength and light weight.
Metals: Gold, Silver, Platinum
Precious metals like gold, silver, and platinum are popular choices for engagement and wedding rings. These metals are durable and beautiful, making them a great choice for a lifelong symbol of your love. But how do you choose the right metal for your ring?
Here are a few things to consider when choosing the metal for your ring:
- Gold is a classic choice for engagement and wedding rings. It is durable and hypoallergenic, making it a good choice for people with sensitive skin. Gold comes in a variety of colors, from yellow to white to rose gold.
- Silver is another popular choice for engagement and wedding rings. It is softer than gold, so it may scratch more easily. Silver is also more affordable than gold.
- Platinum is the most expensive metal used in jewelry. It is very strong and resistant to tarnishing. Platinum is also hypoallergenic, making it a good choice for people with sensitive skin.
How to Make a Ring
In order to create a ring, you will need the following materials:
- -A piece of wire
- -A mandrel (or other cylindrical object)
- -A pair of pliers
- -A hammer
- -A file
- -A saw (optional)
1. Begin by wrapping the wire around the mandrel to form a coil. Leave about 2 inches of excess wire at the end.
2. Use the pliers to grip the end of the wire, and then use the hammer to flatten it out. This will help to secure the coil in place.
3. Use the file to smooth out any sharp edges on the flattened end of the wire.
4. Wrap the wire around the mandrel again, this time overlapping the previous coil by about half an inch. Again, leave about 2 inches of excess wire at the end.
5. Repeat steps 2-4 until you have reached your desired thickness for the ring band.
6. Once you have reached your desired thickness, use a saw (if necessary) to cut off any excess wire at the end.
7. Finally, use the file to smooth out any sharp edges on the ring band.
Keep an eye for more latest news & updates on Buzz Slash!